ASME B16.14-2018 pdf free download.Ferrous Pipe Plugs, Bushings, and Locknuts With Pipe Threads
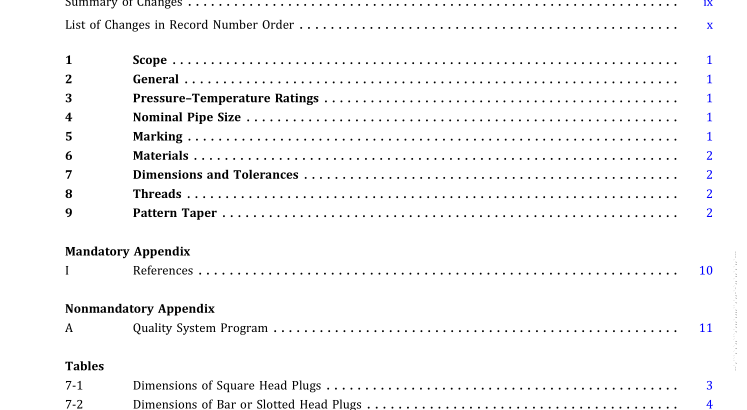
1 SCOPE
This Standard covers the following:
(a) pressure–temperature ratings
(b) size
(c) marking
(d) materials
(e) dimensions and tolerances
(f) threading
(g) pattern taper
2 GENERAL
2.1 References
Standards and specifications adopted by reference are shown in MandatoryAppendixI. Itis notconsidered prac- tical to identify the edition of each referenced standard and specification in the text. Instead, the editions of the referenced standards and specifications are listed in Mandatory Appendix I. 2.2 Quality Systems Requirements relating to the product manufacturer’s q ua l i ty s ys te m p ro gra m a re d e s c ri b e d i n Nonmandatory Appendix A.
2.3 Relevant Units
This Standard states values inboth SI (metric) units and U.S. Customary units. These systems of units are to be regarded separately as standard. Within the text, the U.S. Customary units are shown in parentheses. The values stated in each system are not exact equivalents; therefore, it is required that each system of units be used independently of the other. Combining values from the two systems constitutes nonconformance with the Standard.
2.4 Service Conditions Criteria for selection ofmaterials suitable forparticular fluid service are not within the scope of this Standard.
2.5 Convention For determining conformance with this Standard, the convention for fixing significant digits where limits (maximum and minimum values) are specified shall be as defined in ASTM E29. This requires that an observed orcalculatedvalueberoundedofftothenearestunitinthe lastright-hand digitused forexpressingthe limit. Decimal values and tolerances do notimply a particular method of measurement.
2.6 Denotation
2.6.1 PressureRating Designation. Class followedbya dimensionless number is the designation for pressure– temperature ratings.
2.6.2 Size. Nominal pipe size (NPS) followed by a dimensionless number is the designation for nominal flange or flange fitting size. NPS is related to the reference nominal diameter, DN, used in international standards. The relationship is, typically, as follows:
NPS DN
1 25
1 1 ∕ 4 32
1 1 ∕ 2 40
2 50
2 1 ∕ 2 65
3 80
3 1 ∕ 2 90
4 100
For NPS ≥ 4, the related DN = 25 × (NPS)
3 PRESSURE–TEMPERATURE RATINGS (a) Pressure–temperature ratings for plugs and bush- ingsshallbeinaccordancewithASMEB16.4ifmadeofcast iron, orASME B16.3 ifmade ofmalleable iron, ductileiron, or steel. Use of cored plugs or hexagon head bushings should be limited to Class 125 cast iron and Class 150 malleableironthreadedfittings. Solidplugs andfacebushings are recommended for use with Class 250 cast iron fittings and Class 300 malleable iron fittings. (b) Locknuts are not pressure–temperature rated.
4 NOMINAL PIPE SIZE
As applied in this Standard, the use of the phrase “nominal pipe size” or the designation NPS followed by a dimensionless numberis foridentifyingthe end connec- tion offittings. The number is notnecessarily the same as the fitting inside diameter.
5 MARKING Each fitting shall be marked for identification with the manufacturer’s name or trademark, except where a marking is impractical.
6 MATERIALS (a) These fittings are furnished in gray iron, malleable iron, ductile iron, or steel as indicated in the individual tables. (b) The chemical and mechanical properties of cast material shall equal or exceed those properties listed in ASTM A126, as applicable. Steel castings, forgings, or machined bar properties shall correspond to the comparable ASTM casting material specifications. The fittings manufacturer shall be prepared to certify conformance based on test data.
7 DIMENSIONS AND TOLERANCES (a)
Dimensions in metric units are given in Tables 7-1 through 7-5 for various types of fittings. (b) At no point in the component wall shall the metal thickness be less than 90% of the values listed in the tables.
8 THREADS
8.1 Thread Form All threads shall be in accordance with ASME B1.20.1.
8.1.1 Countersinks and Chamfers. All internal taper pipethreadsshallbecountersunkorchamferedadistance ofnotless than one-halfthe pitch ofthe thread atan angle of approximately 45 deg with the axis of the thread. External taper pipe threads shall be chamfered at an angle between 30 deg and 45 deg with the axis, for easier entrance in making a joint and protection of the thread. Countersinking and chamfering shall be concentric with the threads. The length of threads specified in all tables shall be measured to include the counter- sink or chamfer.ASME B16.14 pdf download.ASME B16.14-2018 pdf free download
