ASME B16.18-2021 pdf free download.Cast Copper Alloy Solder Joint Pressure Fittings
5 MARKING Each fitting shall be permanently marked with the manufacturer’s name or trademark and other applicable markings as required by MSS SP-25. Marking of fittings less than Standard Water Tube Size 1 ∕ 2 or on any fitting where it damages soldering surfaces is not required. Fittings manufactured from cast copper alloys containing silicon shall be permanently marked with the designation Si. Fittings manufactured from cast copper alloys containing bismuth shall be permanently marked with the designation B or Bi.
6 MATERIAL (a) Castings intended for use in applications up to 400°F (204°C) shall be ofa copper alloyproduced to meet (1) the requirement of ASTM B62 Alloy C83600 (2) the tensile requirements of ASTM B584 Alloy C83800 or C84400 and, in all other respects, shall comply with the requirements of ASTM B62 (b) Castings intended for use in potable water applica- tions up to 200°F (93°C) shall be low lead (0.25% or less) and shall be (1) of a copper alloy produced to meet the require- ments of ASTM B584 Alloy C87850 or C89833, or (2) ofother cast copper alloys, provided the fittings produced meet mechanical and corrosion-resistant prop- erties needed for potable water application
7 METAL THICKNESS Dimensional variations occur in the casting process. Pattern equipment shall be designed to produce the metal thickness given for fittings in Table 8.2-2. The minimum wall thickness shall be not less than 90% of the body and jointwall thickness as shown in Table 8.2-2.
8 INSPECTION TOLERANCE
8.1 Convention For determining conformance with this Standard, the convention for fixing significant digits where limits (maximum or minimum values) are specified shall be as defined in ASTM E29. This requires that an observed orcalculatedvalueberoundedofftothenearestunitinthe lastright-hand digitused forexpressingthe limit. Decimal values and tolerances do notimplya particular method of measurement.
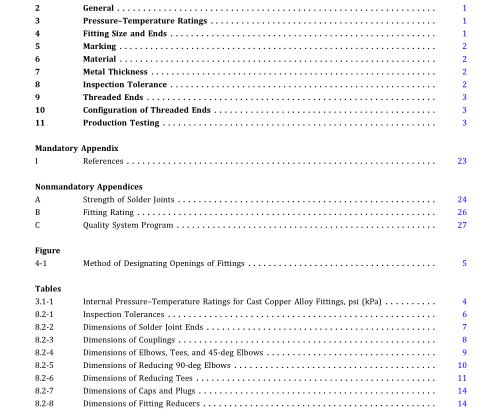
8.2 Linear Dimensions Aninspectiontolerance as shown inTable 8.2-1 shall be allowed on center-to-shoulder, center-to-center, center- to-threaded-end, and shoulder-to-threaded-end dimen- sions on all fittings having female solder (solder cup) ends, and on center-to-solder-end and solder-to- threaded-end dimensions on all fittings having male solder (fitting) ends. Couplinginspectionlimitsforshoulder-to-shoulderand shoulder-to-end dimensions shall be double those shown in Table 8.2-1, except that the minus tolerance applied to dimensions M, N, andWinTables 8.2-3 shall notresultina dimension less than 0.06 in. (1.5 mm) for sizes 1 ∕ 4 through 1 in., inclusive, or a dimension less than 0.09 in. (2.3 mm) for the larger sizes. The largest opening in the fitting governs the tolerance to be applied to all openings. Tables 8.2-2 through 8.2-18 offer dimensions for pres- sure fittings covered by this Standard.
8.3 Ovality Maximum ovality shall not exceed 1% ofthe maximum diameters shown in Table 8.2-2. The average of the maximum and minimum diameters must be within the dimensions shown in the table.
8.4 Gaging of Solder Joint Ends
8.4.1 Standard Gaging Method. The standard method of gaging the diameter tolerances for male and female ends shall be by the use of plain plug and ring gages designed to hold the product within the limits established in Table 8.2-2.
8.4.2 Optional Gaging Method. For gaging the diameter tolerance of male and female ends, the manu- facturer may use direct reading instruments instead of ring and plug gages as specified in para. 8.4.1. When gaging the diameters of male and female ends using direct reading instruments, refer to para. 8.3.
8.5 Standard Gaging Method of Threaded Ends Thestandardmethodofgagingtheexternalandinternal threaded ends shall be in accordance with the require- ments of ANSI/ASME B1.20.1.
8.6 Alignment The maximum-allowable deviation in the angularalign- mentofanyopeningshall be 0.06 in./ft(5 mm/m) (0.5%).
9 THREADED ENDS
9.1 Thread Type Fittingthreads shall be righthand, conformingto ANSI/ ASMEB1.20.1,PipeThreads,GeneralPurpose(Inch).They shall be taper threads (NPT).
9.2 Countersink or Chamfer All internal threads shall be countersunk a distance not less than one-half the pitch of the thread at an angle approximately 45 deg with the axis of the thread, and all external threads shall be chamfered at an angle of 30 deg to 45 deg from the axis, for easier entrance in making a joint and protection of the thread. Counter- sinking and chamfering shall be concentric with the threads.
9.3 Threading Tolerances Tolerance for an internal threaded end having an internal shoulder shall be from the gage reference point (notch) to one turn small. Tolerance for an internal threaded end without shoulder and for an external threaded end shall be from one turn small to one turn large.ASME B16.18 pdf download.ASME B16.18-2021 pdf free download
